

Circles on the wall…

Again a text about an item from the CC box… I must agree that I craft a lot with these boxes, because there is so much stuff inside and I like to use it all up.
A few weeks ago, at the airport in Germany, I saw in a home-style-magazine a nice wall picture made with rope. I don´t remember everything about this picture, but when I arrived home, I discovered in one of the CC boxes a DIY Kit for a small rope basket and my memory took me back to the lovely picture in the magazine. So I decided not to clean the flat and to use the rope instead to create my circles on the wall (to improve my creativity). It has now taken me a month to write this tutorial, because it wasn’t so easy to get the pictures looking the way I wanted nothing to do with me or my photographic talents…


You will need for a little wall picture (20 cm high)
- 1.5 m rope (like I said, I took mine from the CC Western Box )
- Wool in different colours (I used quite a thick wool)
- Paper or Felt
- Hot Glue Gun
- Fork
- Scissors
How to..
ROPE CIRCLES
- I started to make one circle after the next. The good thing about this craft is that every wall picture will look different, depending on how you designed your circles, which colours you used and how you arranged the circles afterwards on the paper.
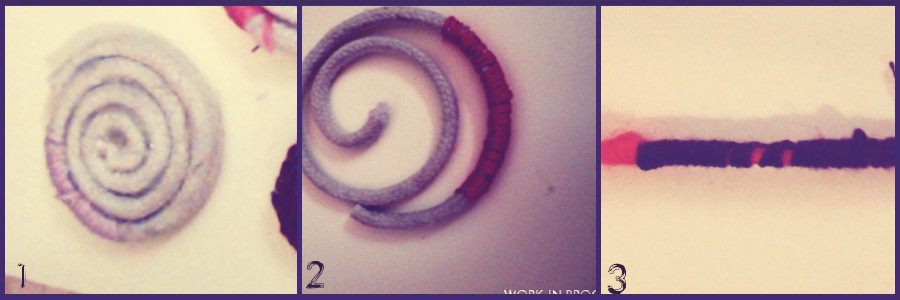
- I took a piece (10 cm) of rope, put glue on it and made a ‘snail’. Thanks to the brilliant hot glue gun, snail was finished and dry in a few seconds.
- The first snail is ready
- For the next one I decided to wrap the rope with wool in a different colour, before putting glue on it and creating another snail.
- The third one was a combination of wrapped and normal rope. I first glued the wrapped rope to the normal rope, then made my snail shape as before.
WOOL CIRCLES
- I took six 15-20cm strands (grouped into three pairs) of wool in the same colour and wove them into a braid. Here is a good tutorial to bind braids, if you don´t know how to do it.
- Afterwards, I made a knot at the end and then again put glue on it and made a snail.
- I repeated the last two steps but this time only with three single strings and shorter lengths.
- You can repeat this with as many colours as you want.
POMPOM
I used a fork to created pompoms in different colours.
- I wrapped the wool around the spikes of the fork (Picture 1)
- I then wrapped the end around the middle of my wool, between the two middle spikes, and created a Bow tie (Picture 2)
- I cut the two edges of the bow – the pompom is ready. (Picture 3)


- I laid every circle on the paper (or felt) and created a shape I liked, then I glued then on to the paper/felt.
- At a final step, I glued the pompoms into the holes (where the circles don’t cover the paper) and glued the small braided snails beside the non-coloured rope snails to make it more colourful.
- Cut your completed shape out and fix the picture on the wall.
- Hope you enjoyed the tutorial

I am very impressed!! I want that
LikeLike
Thank you 🙂 and you can have that 😉
LikeLike
very lovely creative site!!
LikeLike
Thank you Minako 🙂
LikeLike